

Remember a while back I told you I was working on a project? You 'member, right?
I am finally ready to tell you all about it. Warning: This is a really long post. Just couldn't seem to make it any shorter.
I had a dilemma, Lou bought me a great camera bag to go with my a-mazing camera. The camera bag is fantastic, its huge and holds all the extras I have acquired since getting my camera for my birthday. But its huge and too cumbersome for some things we do and regular outings. Plus, I don't like having to carry two bags.
Sadly, I can't drop $100+ on a stylish camera bag that can double as a purse. It's just not in the stars right now. So, I did what any girl in my position would. I pulled out the sewing machine and scrap paper and got to work.
I spent weeks searching for the perfect bag to transform into a camera bag/purse. I had a lot of things that I wanted to be incorporated in the bag.
1. Two straps - One shoulder strap and a handle. The shoulder strap makes it easy to take pictures without having to set down the bag.
2. Easy access - Something that I would easily be able to pull my camera out of when that perfect shot was spotted.
3. Roomy - Enough room for the camera body with lens attached and a few personal items.
5. Pockets - Who doesn't love pockets? Enough said.
6. ZipZip - A zipper to close the bag in case of a lot of activity or light rain.
7. Versatility - A design that could go with many outfits.
And here she is:
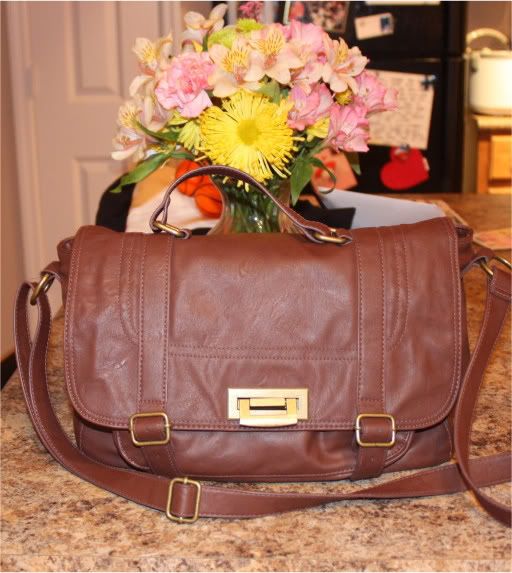
Please excuse the messy kitchen.
The bag is from Forever 21 ($28). I just happened to get a gift card for F21 for my birthday, so it worked out great.
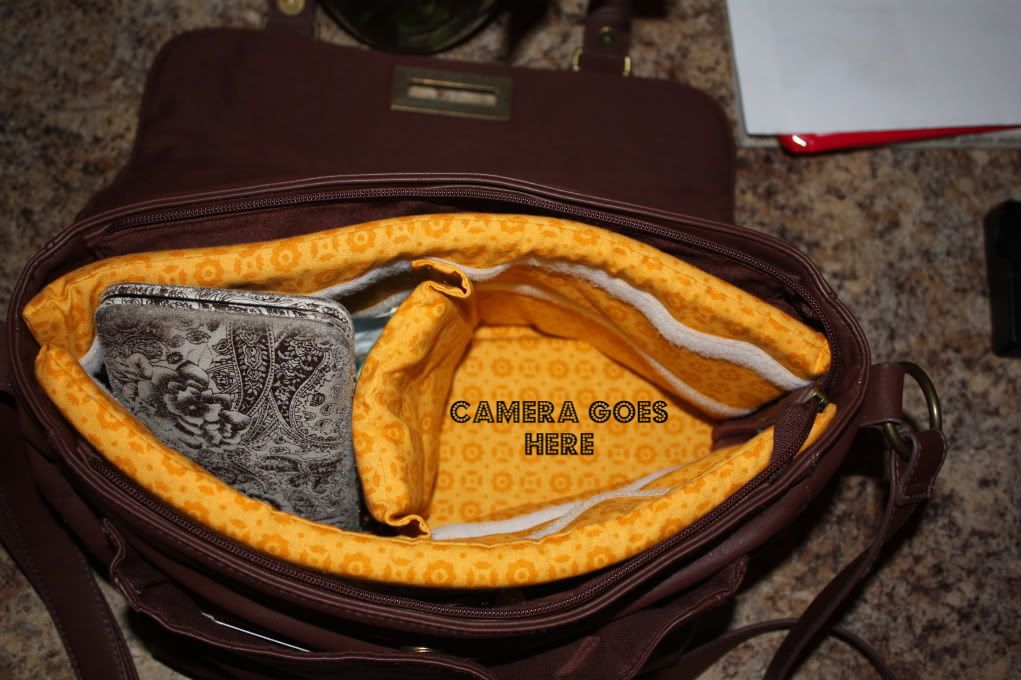
Once I had the bag I spent days mulling over possible designs for the padded interior. I choose to go with a design that would line the front, bottom, and back of the bag. I ditched the side padding because I felt it would make the bag bulker then I would like it to be. Add some dividers and viola, camera bag/purse.
Steps:
1. I measured out the bag. Bottom, front, and sides.
2. Purchased materials:
* Fabric - 1 yard
* Foam Padding - 1/2 yard, 1/2inch thick
* Velco - Two packs
Note: I purchased more fabric and foam then I needed to be able to make more dividers down the road.
3. Drew out my plans. This helped me a lot because I could visualize where things would end up and what kinks would need to be smoothed out. If you are an experienced crafter you might skip this step.
4. Cut out all the fabric and foam pieces.
5. Sewing, lots of sewing.
I decided to make the lining one piece. My bag measurements were: Front & Back 13"x8" and Bottom 13"x6". I cut out three pieces of foam 13"x7" (2 pieces) and 13"x6". I made the foam pieces for the front and back an inch shorter so they would be able to sit on the bottom piece of foam without popping out of the bag.
For the fabric that would cover the lining I made a kind of pillowcase to put all three foam pieces in. (Had I thought of it, I would have taken picture of this) The pillowcase measured 23"x14", I added an inch all around for the foam to sit in it without stretching the fabric. And 2 extra inches for in between the pieces of foam to give slack so the side pieces could sit on the bottom piece.
Sewing the pillowcase/lining fabric:
1. Cut two pieces of fabric and three pieces of foam.
2. Sew velco lines on one piece of fabric before sewing the two together. I did two lines of velco on each side about 2 inches apart. I used the softer velco part for this so it wouldn't snag on anything.
3. Sew the two pieces of fabric together (pattern facing in). Sew 3 sides completely. The forth side leave a space in the middle so you can flip the fabric out and insert your foam pieces. Once you insert the foam, sew up the access hole by hand.
4. Push the two side pieces of foam to the ends and line up the middle piece (leaving space between the 3 pieces) sew a couple of lines in between the foam to keep the foam in place.
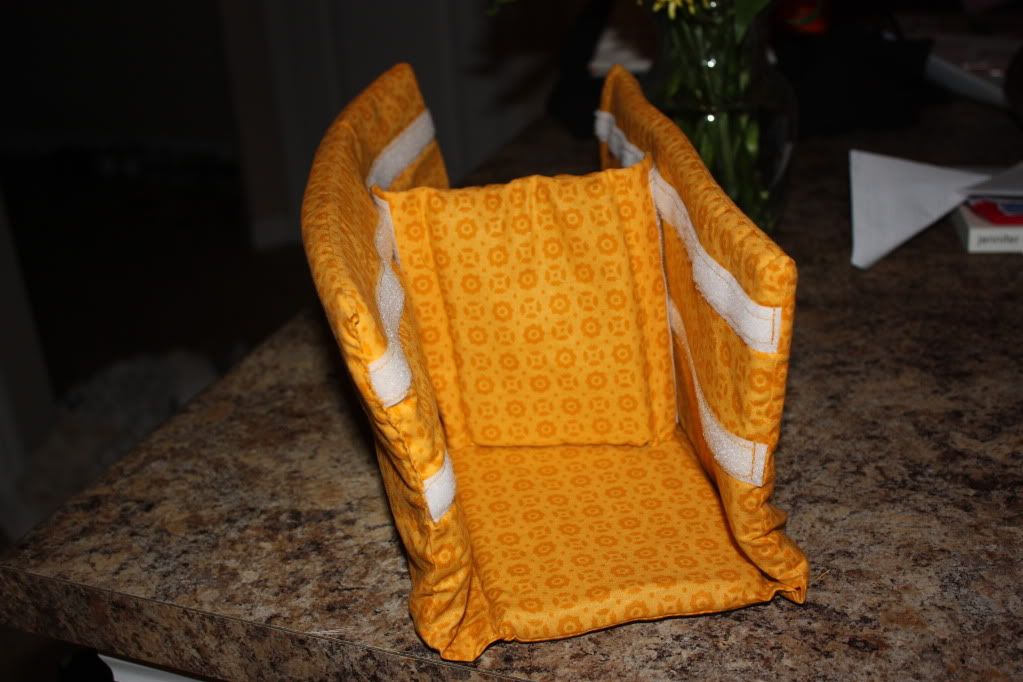
When you are done it should look something like this:

Your lining should be able to sit in your bag. Some people may want to hand stitch the lining to the bag for stability. I choose not to, in case I want to use the lining in another bag or take it out to wash.
So far, I have only made one divider. I don't have a use for more at the moment. But as I said, I have the extra foam and fabric for later use.
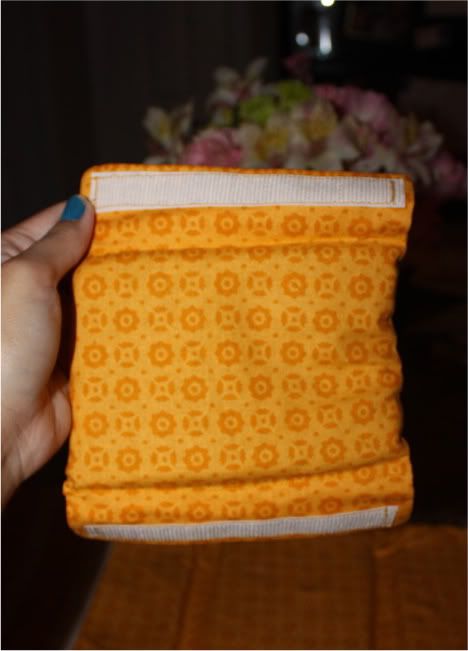
Sewing the divider fabric:
1.Cut two pieces of fabric. My foam piece was 6"x5" and the fabric was 7"x7" (extra space for the velco on each side).
2. Sew the two pieces of fabric together (pattern facing in). Sew 3 sides completely. The forth side leave a space in the middle so you can flip the fabric out and insert your foam pieces. Once you insert the foam sew up the access hole by hand.
3. Push the foam to the middle of the fabric, leaving to sides foamless.
4. Sew two pieces of velco onto the foamless sides.
When you are done it should look something like this:
Eventually I will make more dividers and use the same general pattern.
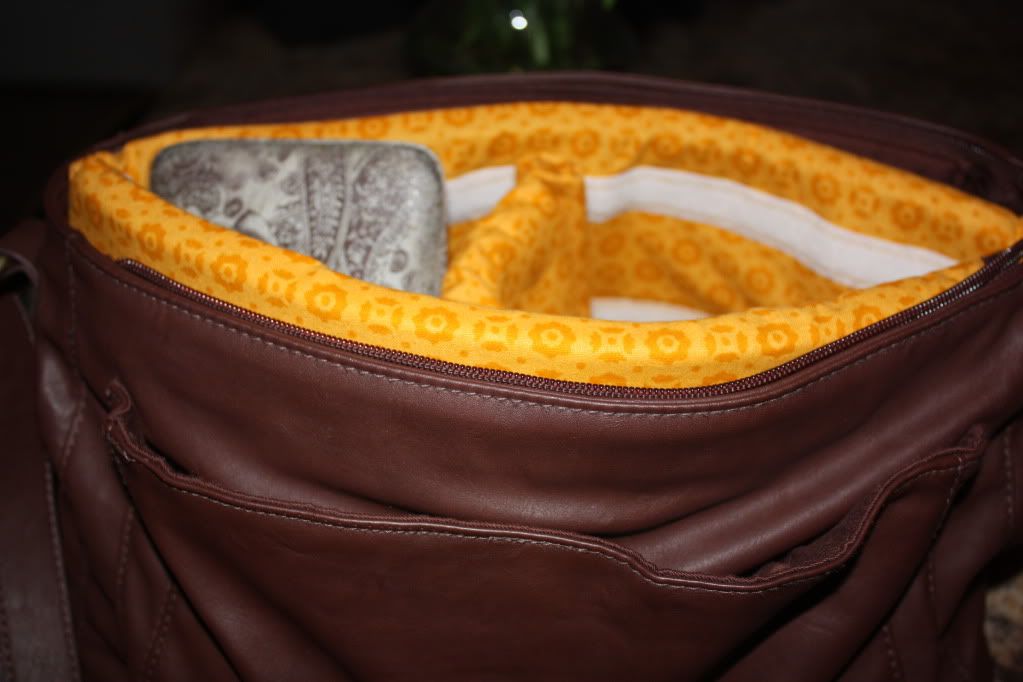
Here are some more pictures of the bag with the foam padding inside and the foam padding itself.
Here is the breakdown of what I spent on the project, after it was all said and done.
$28 - Bag (F21)
$15 - Fabric, foam, and velco
$43 - Total cost
I hope this walk through helps those of you who are attempting this at home. If not, thanks for reading anyhow. You are too sweet to put up with me.
If anyone has questions about the walk through, I would be happy to try to answer them and update the post with more tips. Just shoot me an email: shellsea.oberski{at}gmail.com


1 comment:
You are amazing. Can I bask in your talent for a while?
Post a Comment